5 Steps to Addressing Leaks and Water Damage in Your Home
Water damage is a pervasive and potentially devastating issue that homeowners face worldwide. In the United States alone, it ranks as the second most common insurance claim for homeowners, with millions of properties affected each year. The impact of water damage extends far beyond just structural damage; it can lead to health hazards, mold growth, and costly repairs. Addressing leaks and water damage promptly is essential to mitigate these risks and protect your home and family. In this comprehensive guide, we’ll delve into five crucial steps to effectively identify, address, and remediate leaks and water damage in your home.
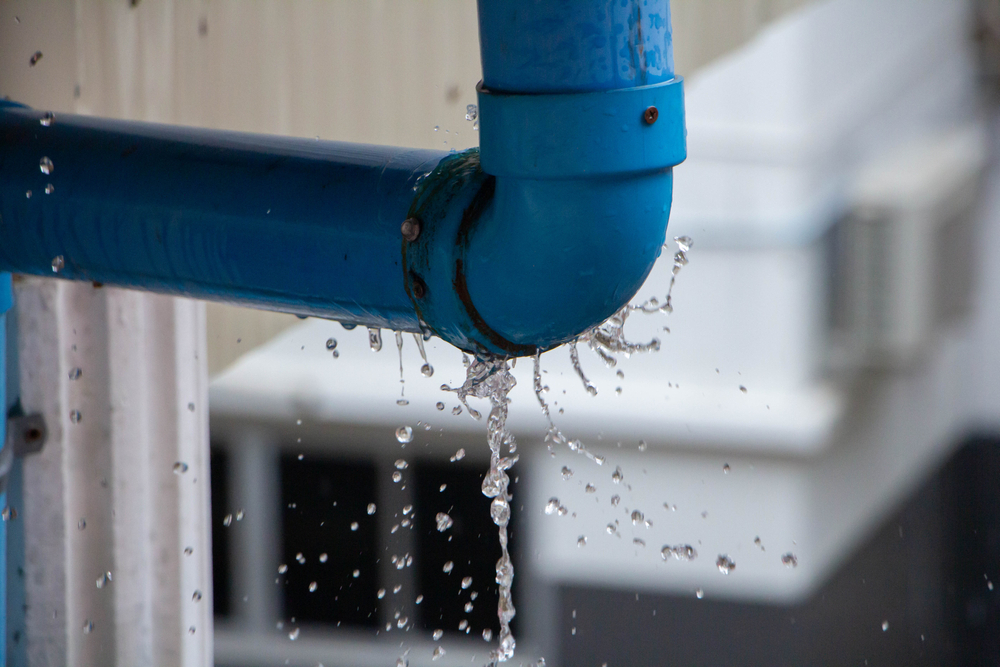
Step 1: Identify the Source of the Leak
The first step in dealing with water damage is to identify the source of the leak accurately. Leaks can originate from various sources, including burst pipes, roof damage, faulty appliances, or plumbing issues. Identifying the source early on is critical to preventing further damage and ensuring targeted repairs. Here’s a detailed explanation of common causes of leaks:
- Burst Pipes: Cold temperatures, aging pipes, or high water pressure can cause pipes to burst, resulting in significant water damage.
- Roof Damage: Missing or damaged shingles, deteriorated flashing, or clogged gutters can lead to roof leaks, especially during heavy rainfall or snowmelt.
- Faulty Appliances: Appliances such as dishwashers, washing machines, and water heaters can develop leaks due to worn-out hoses, faulty seals, or internal malfunctions.
- Plumbing Issues: Leaks can occur in plumbing fixtures such as sinks, toilets, and bathtubs due to worn-out gaskets, loose fittings, or cracked pipes.
Tips for identifying the source of a leak
- Conduct a visual inspection of your home, paying close attention to areas prone to water damage, such as bathrooms, kitchens, basements, and attics.
- Use a moisture meter or thermal imaging camera to detect hidden leaks behind walls, under floors, or in ceilings.
- Monitor your water meter for unexpected increases in water usage, which could indicate a hidden leak.
- Addressing the source of the leak is paramount before proceeding with any repairs. Failure to address the root cause may result in recurring leaks and further damage to your home.
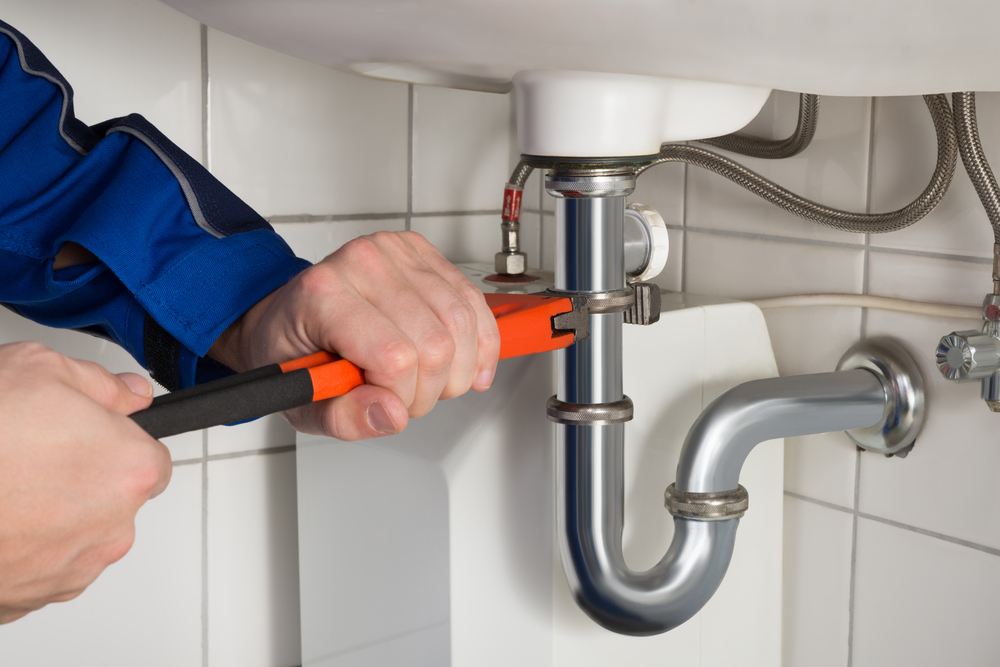
Step 2: Stop the Leak
Once you’ve identified the source of the leak, it’s crucial to take immediate action to stop it. The method for stopping the leak will depend on its cause and severity. Here’s a step-by-step guide on how to stop different types of leaks:
1. Burst Pipes:
- Shut off the main water supply to your home to prevent further water damage.
- Open faucets to drain any remaining water from the pipes.
- Contact a licensed plumber to repair or replace the burst pipe.
2. Roof Leaks:
- Temporarily patch the damaged area with roofing cement or waterproof tape to prevent water infiltration.
- Place buckets or tarps in the affected area to collect water and minimize interior damage.
- Schedule a professional roof inspection and repair to address the underlying cause of the leak.
3. Appliance Leaks:
- Turn off the appliance and disconnect it from the power source.
- Shut off the water supply to the appliance, if possible.
- Inspect the appliance for visible signs of damage or leaks, such as puddles of water or rusted components.
- Repair or replace faulty parts or call a qualified technician for assistance.
4. Plumbing Leaks:
- Turn off the water supply to the affected fixture using the shut-off valve.
- Place a bucket or towel under the leak to catch dripping water.
- Inspect the plumbing fixture for visible signs of damage or leaks, such as water stains or dampness.
- Tighten loose fittings, replace worn-out gaskets, or call a plumber service for professional repairs.
It’s essential to address pipe leaks promptly to prevent further damage to your home and belongings. Even small leaks can escalate into major issues if left untreated, leading to mold growth, structural damage, and increased repair costs.
Step 3: Assess the Water Damage
Once the leak has been stopped, the next step is to assess the extent of the water damage in your home. Water damage is categorized into three levels based on the type of water involved and the potential health risks:
Clean Water Damage:
- Clean water damage is caused by water from a clean source, such as a burst pipe or overflowing sink.
- This type of water damage poses the least risk to health and can often be remediated with minimal disruption.
- However, if left untreated, clean water damage can still lead to mold growth and structural damage over time.
Grey Water Damage:
- Grey water damage contains contaminants and may come from sources such as dishwashers, washing machines, or sump pump failures.
- This type of water damage poses a moderate risk to health and may require more extensive cleanup and disinfection measures.
Black Water Damage:
- Black water damage is the most severe and contains harmful bacteria, viruses, and pathogens.
- It typically results from sewage backups, toilet overflows, or flooding from natural disasters.
- Black water damage poses significant health risks and requires specialized cleanup and disinfection procedures to ensure the safety of occupants.
Tips for assessing water damage:
- Document the extent of the damage by taking photographs and videos of the affected areas.
- Check for signs of mold growth, such as musty odors, discolored walls or ceilings, or visible mold growth.
- Use a moisture meter or hygrometer to measure the moisture levels in building materials such as drywall, wood, and insulation.
- Consult with a water damage restoration professional to conduct a thorough assessment and develop a comprehensive remediation plan.
- Thoroughly assessing the water damage is essential for determining the appropriate cleanup and repair measures and ensuring the safety and well-being of your family.
Step 4: Mitigate the Damage
With the extent of the water damage assessed, the next step is to mitigate the water damage to prevent further issues such as mold growth, structural damage, and indoor air quality problems. The mitigation process involves several key steps:
1. Removing Standing Water:
- Use pumps, wet vacuums, or sump pumps to remove standing water from affected areas.
- Dispose of contaminated water safely and according to local regulations.
2. Drying Out Affected Areas:
- Use dehumidifiers, air movers, and fans to dry out wet materials and prevent mold growth.
- Monitor moisture levels regularly and continue drying until moisture levels return to normal.
3. Disinfecting Surfaces:
- Clean and disinfect all affected surfaces, including floors, walls, and furniture, to eliminate bacteria, viruses, and mold spores.
- Use EPA-approved disinfectants and follow manufacturer instructions for proper application and contact time.
4. Removing Mold:
- If mold growth is present, hire a certified mold remediation specialist to safely and effectively remove mold and prevent regrowth.
- Wear appropriate personal protective equipment, such as gloves, goggles, and respirators, when handling mold-contaminated materials.
- It’s crucial to act quickly to mitigate the damage and prevent further deterioration of your home and indoor environment. Mold can begin to grow within 24 to 48 hours of water damage, so prompt action is essential to minimize its impact.
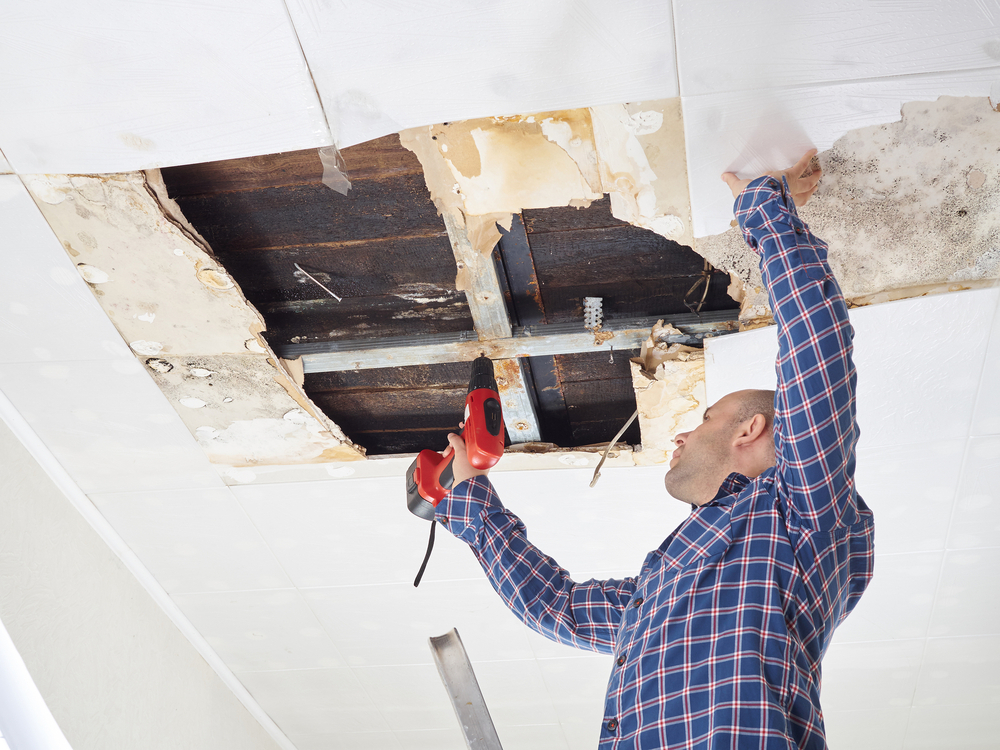
Step 5: Repair and Restore
Once the water damage has been mitigated, the final step is to repair and restore your home to its pre-damaged condition. Depending on the extent of the damage, you may need to hire a professional restoration company to handle major repairs and renovations. Here’s an overview of the repair and restoration process:
1. Structural Repairs:
- Assess and repair any structural damage caused by water, such as warped floors, sagging ceilings, or compromised walls.
- Replace damaged building materials, such as drywall, insulation, or flooring, as needed.
2. Cosmetic Repairs:
- Restore the aesthetic appearance of your home by repainting walls, refinishing floors, and replacing damaged trim or fixtures.
- Ensure that all repairs are completed to industry standards and local building codes.
3. Preventative Measures:
Implement measures to prevent future water damage, such as installing a sump pump, upgrading plumbing fixtures, or reinforcing vulnerable areas of your home.
4. Insurance Claims:
- Contact your insurance provider to file a claim for water damage restoration and repairs.
- Document all repairs and expenses related to the water damage for reimbursement purposes.
- While some repairs may require the expertise of professionals, there are also minor repairs that homeowners can tackle themselves. Here are some tips for DIY repairs:
- Fixing leaky faucets, toilets, or showerheads by replacing worn-out washers, gaskets, or seals.
- Repairing small drywall or plaster cracks with spackling compound or joint compound.
- Replacing damaged caulk or weather-stripping around windows and doors to prevent water infiltration.
- It’s essential to prioritize safety and quality when undertaking DIY repairs and to seek professional plumber assistance for complex or hazardous tasks.
Conclusion
In conclusion, addressing leaks and water damage in your home requires a systematic and proactive approach. By following the five steps outlined in this guide – identifying the source of the leak, stopping the leak, assessing the water damage, mitigating the damage, and repairing and restoring your home – you can minimize the impact of water damage and protect your property investment. Remember, taking immediate action is crucial to prevent further damage and ensure the safety and well-being of your family. If you have any questions or would like to share your experiences, we encourage you to leave a comment below. Together, we can safeguard our homes against the threat of water damage and enjoy peace of mind for years to come.
Plumbing Services CA
https://maps.app.goo.gl/31Yt4rhDrainzNJ4A
(279) 203-0765
https://plumbingservicesca.com/